

SMS Drip campaigns are a form of marketing automation that “drips” a series of pre-written text messages to a targeted audience over a period of time.
Similar to email drip campaigns, SMS drip campaigns (also referred to as drip texting or drip messaging) send information at preset intervals to your audience to keep your business top-of-mind. Typically, the goal of drip campaigns are to guide recipients through the customer journey, towards completing a desired action.
Why Use SMS Drip Campaigns Instead of Email Drip Campaigns?
SMS marketing is highly effective, even more so than email marketing due to several reasons. Here’s just two:
- High open rate: Texts have a 98% open rate which is significantly higher than email’s 45% open rate.
- High click-through rate: Texts average click-through rate is 36% compared to email’s average of 7%. If your desired call-to-action (CTA) is for people to click a link, you need to be texting them.
How Does an SMS Drip Campaign Work?
To create an SMS drip campaign, you write a series of text messages and outline the timing for each. These messages are then triggered by specific actions or events, making sure your audience receives relevant information at the perfect moment.
Here’s a breakdown of the key elements of drip messaging:
- Triggers: These are the events that initiate the drip campaign. Common triggers include subscribing to an SMS list, making a purchase, scheduling a meeting, registering for an event, etc.
- The Drip Sequence: This is the main part of the campaign. Each text message builds upon the previous one, guiding the recipient towards a desired action, such as a website visit or a purchase.
- Timing: The timing between messages is important. You want to keep your audience engaged without bombarding them. Spacing your texts strategically ensures maximum impact.
How to Set Up an SMS Drip Campaign in Skipio
Follow these instructions to create a new drip campaign in Skipio.
Select “Create New Drip Campaign” to open a blank campaign.

Give the campaign a name and description. The name you choose should help you quickly recall what the campaign is about. For the description, we recommend including the purpose of the campaign along with the target audience.
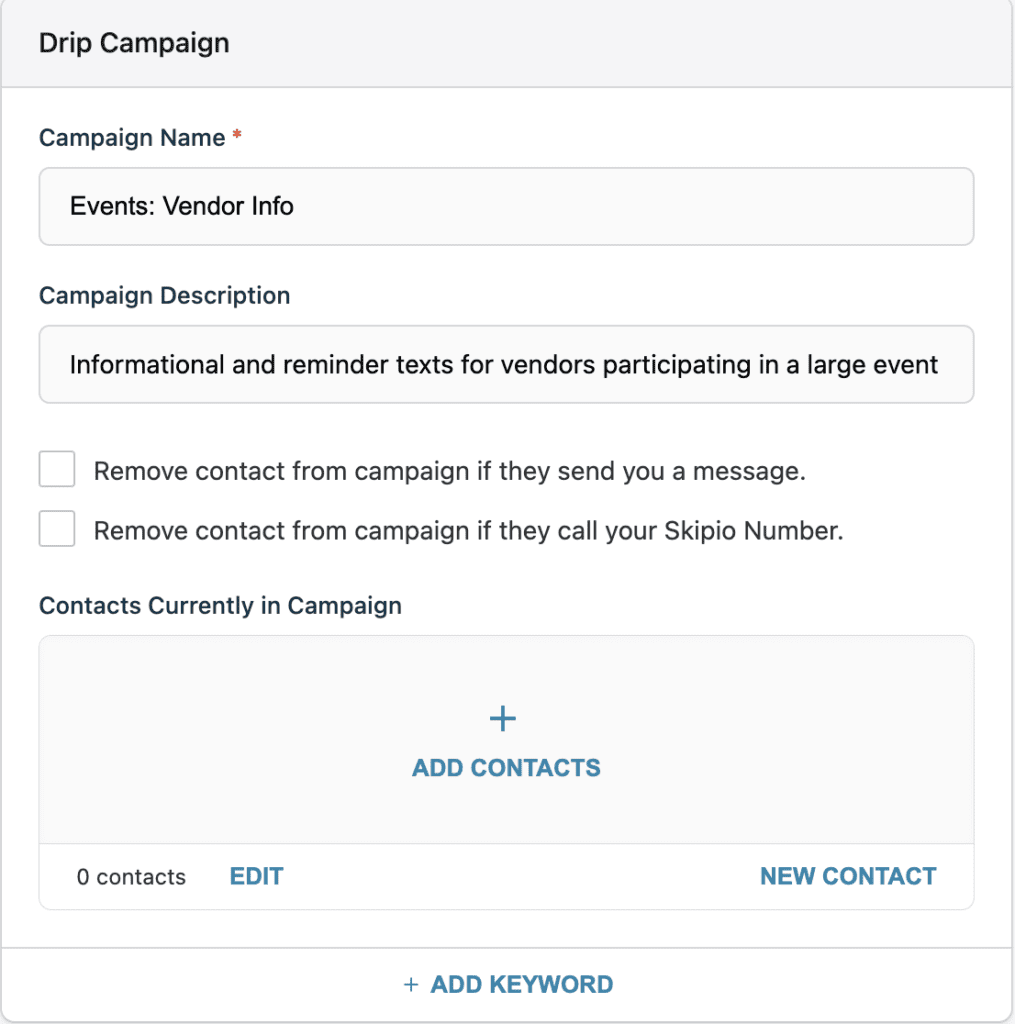
If you check the box to “Remove contact from campaign if they send you a message”, any contact you add to the campaign will be removed automatically if they reply to any of the messages.
For example, we may want to check that box for our campaign offering new referrals a limited-time deal because if someone replies to the first message saying they want to make a purchase, we don’t want them to receive the subsequent messages that “time is running out!”
If you check the box for “Remove contact from campaign if they call your Skipio number”, any contact you add to the campaign will be removed automatically if they call your Skipio number.
For example, we may want to check that box for our campaign trying to get a customer to schedule an appointment because if someone calls your number in response to this campaign, we don’t want them to receive the subsequent messages asking them to “please reach out”.
To add your first message to the drip campaign, scroll down to “Text Message 1”

First, you need to decide when the first message will be sent. “Wait Days” and “Wait Minutes” refer to how many days OR minutes to wait before an added contact receives the first message. For example, if you want all new referrals to receive the first message 5 minutes after you add them to the campaign, set Wait Minutes to 3.
NOTE: When sending a campaign message to more than 100 contacts at a time, we recommend setting a delay time of at least 20 minutes to allow time for all messages to be queued successfully.
If you want all new referrals to receive the first message 3 days after you add them to the campaign, choose Wait Days as 3. Then choose the time of day you want the message to send. Based on the image below, any contact added to this campaign will receive the first message 3 days after they are added, and the message will send at 10:50 AM.
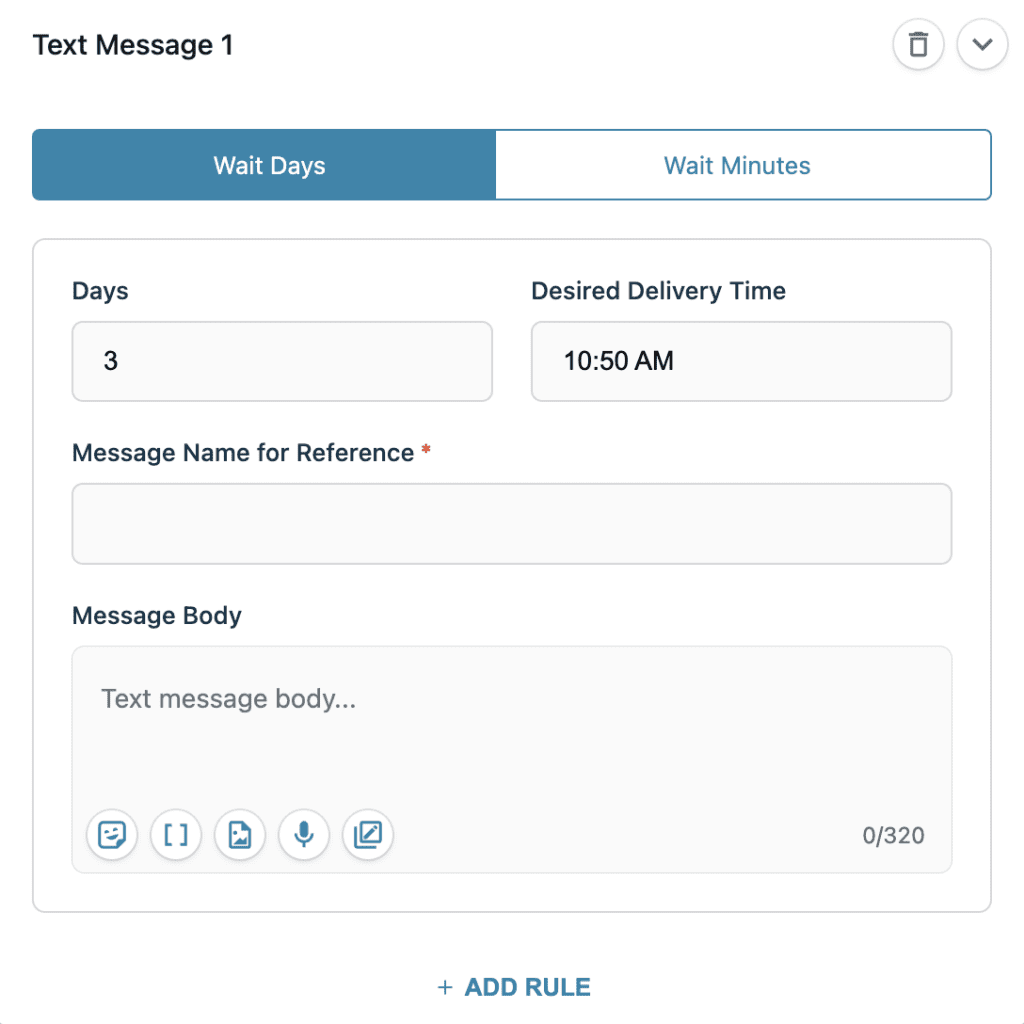
Next, add the Message Name for Reference. Give each message a short but descriptive name so that you can easily tell what each message is about.

Now it’s time to write your first message! You have 320 characters to use. You can personalize the message with each contact’s first name by using the Merge Tags icon ( [ ] ) and selecting “Contact’s First Name”.
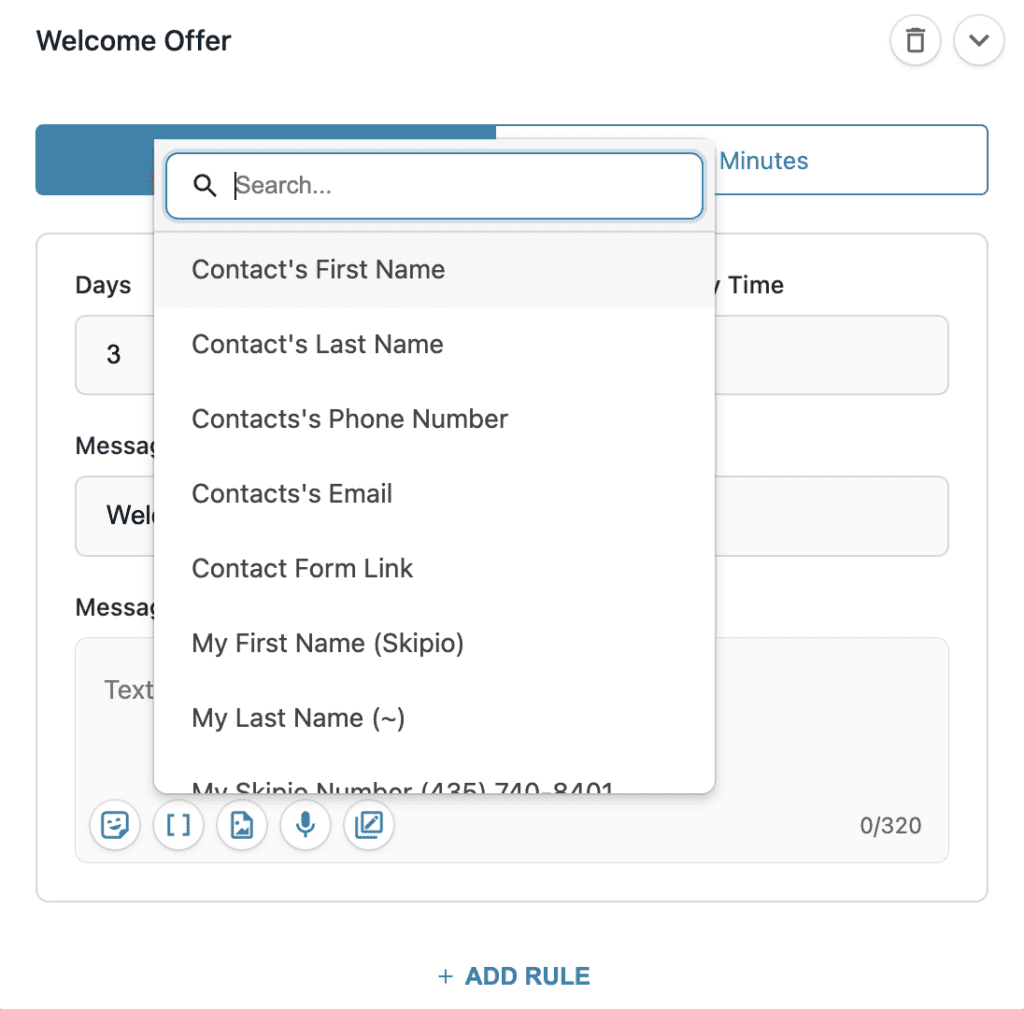
If you have previously set up other Custom Fields, you can use those in your messages too. When set up, this would automatically pull in whatever “status” is entered in the contact sheet for each specific contact and include it in the message.
The other buttons along the bottom of the message body allow you to add emojis, photos, videos, and Ringless Voicemails directly into your campaign messages. You can also access your Message Library and add your saved messages into the message body.
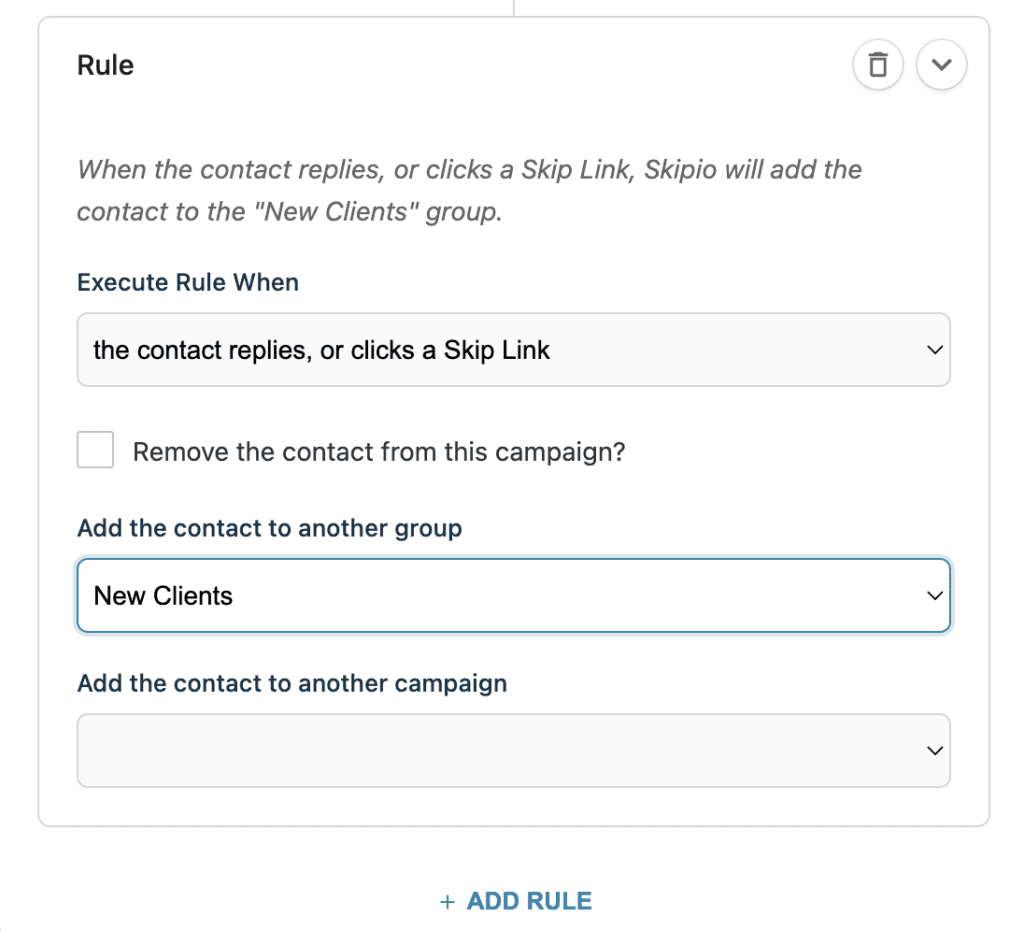
The next option you will see is the + Add Rule button.
Rules dictate what happens if a contact takes a certain action after receiving the associated message.
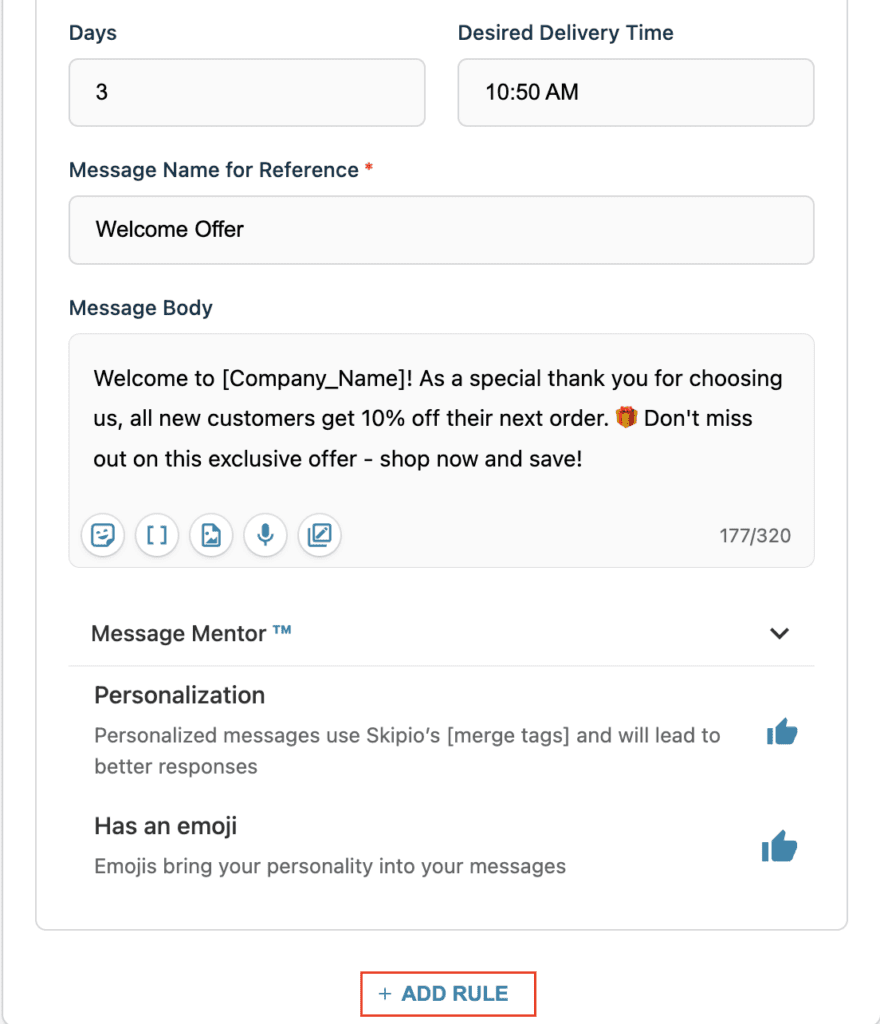
There are 4 different rules and 3 different actions that can be triggered. Each rule can cause multiple things to happen and each message can have multiple rules.
For example, we set up a rule that says: When the contact replies, or clicks a Skip Link, Skipio will add the contact to the “New Clients” group. This means the contact will be automatically added to our chosen group when they reply or click on a Skip Link.

Once you are satisfied with your first message, it’s time to do it all over again!
Click the ( + ) to add another message. For every message after the first, the Wait Days and Wait Minutes correspond to the time the previous message is scheduled to send.
For example, if we choose Wait Days and type 2, the second message will send 2 days after the first message. If we add a third message and choose Wait Days and type 4, the third message will send 4 days after the second message (and 6 days after the first message was sent). If we add a fourth message and choose Wait Minutes and type 10, the fourth message will send 10 minutes after the third message.
Add as many messages and rules as you need and then click Save! The page will refresh and you will be redirected to the fully created campaign. From here you can directly add contacts to the campaign. Just remember that once you add any contacts, the campaign messages will start sending according to the times you chose.
Start Texting with Skipio
Brian Kellogg, a photography studio owner and Skipio user says “[Skipio] is just one of the best platforms out there that I know of that can ease the use of sending a text and having a delay in it in between.”
If you’re ready to start texting your leads and customers, sign up for Skipio today! Skipio helps you boost replies, increase show rates, and grow revenue, all with automated two-way texting. And like Brian said, we do it the best!